Creating sites using the Google Sites service is becoming more and more popular, it is also possible to use your own domain name. To do this, you only need to follow a few steps.
1. Changing name servers in a domain name
The first step you need to complete is to verify your ownership of the domain name. By default, the TXT record on the name servers is used for this.
First, go to the order properties in the "Domains" section of your personal account.
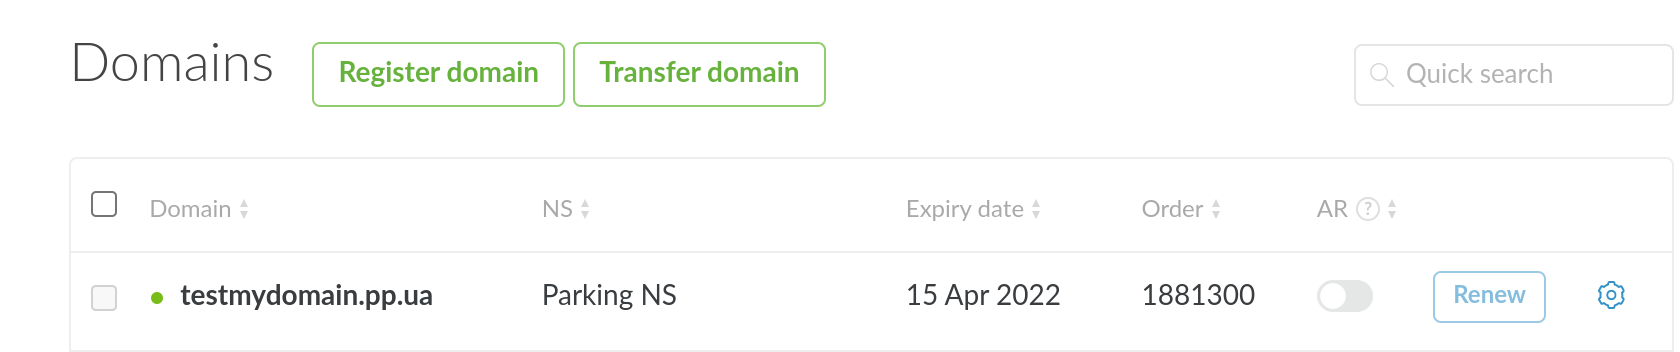
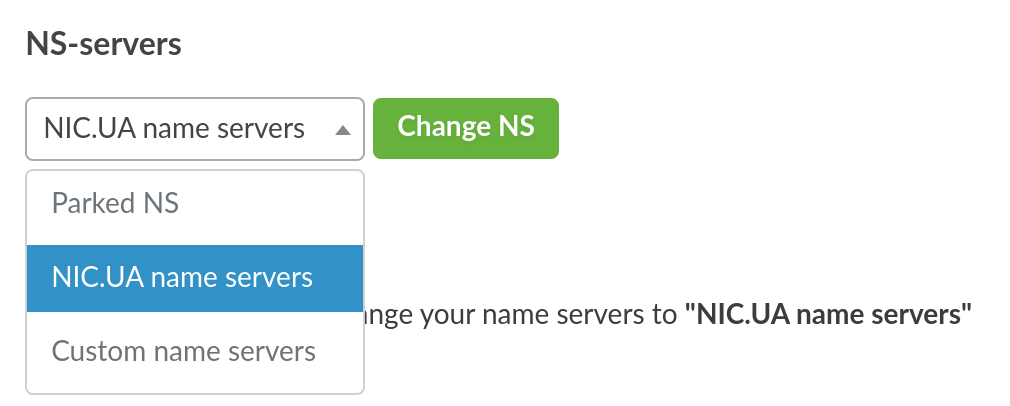
Then select "NIC.UA name servers", click the "Change NS" button and wait for the page to load.
2. Confirming ownership of the domain and directing the domain to the site
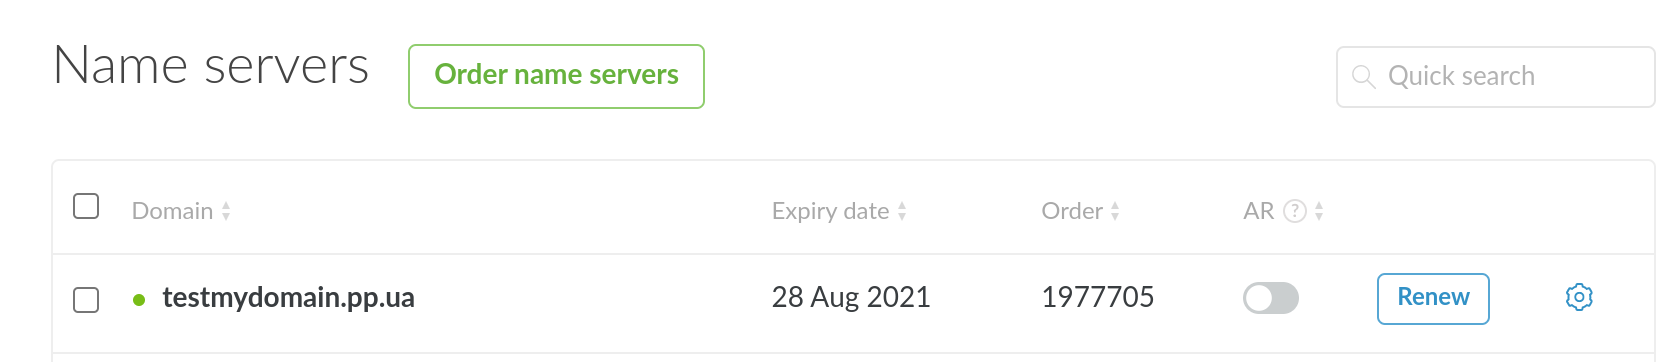
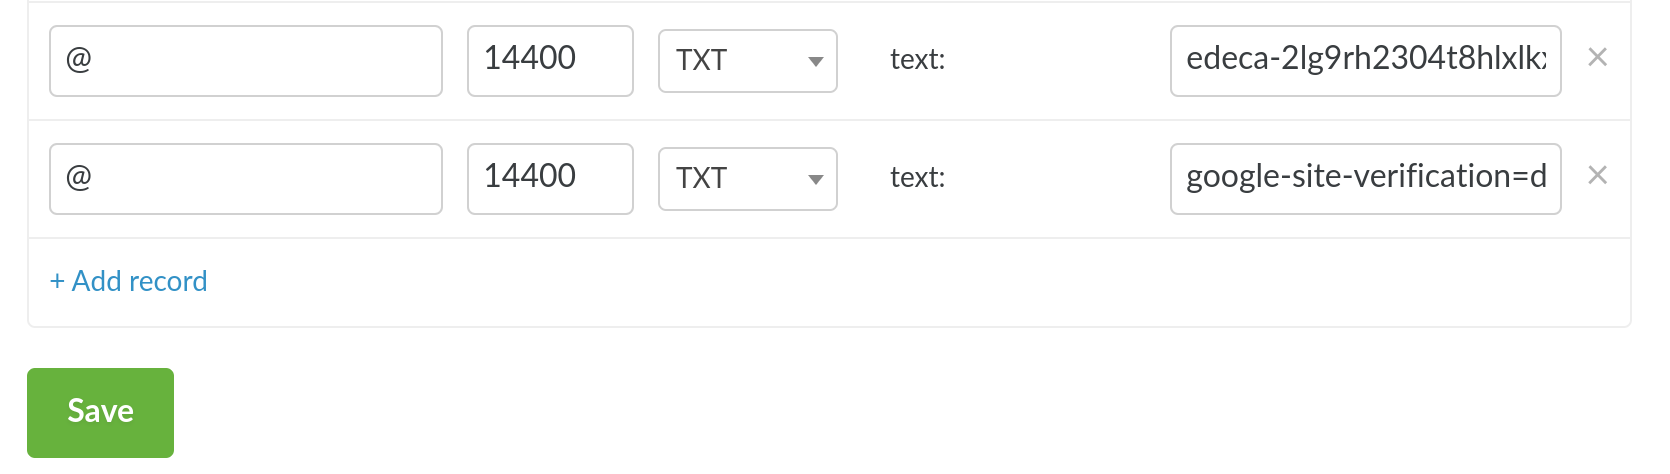
Domain ownership is verified by adding a TXT record. To do this go to the "Name Servers (NS)" section and click on the gear next to the order.
Below on the page, click the "Change" button next to the "DNS Records" heading.
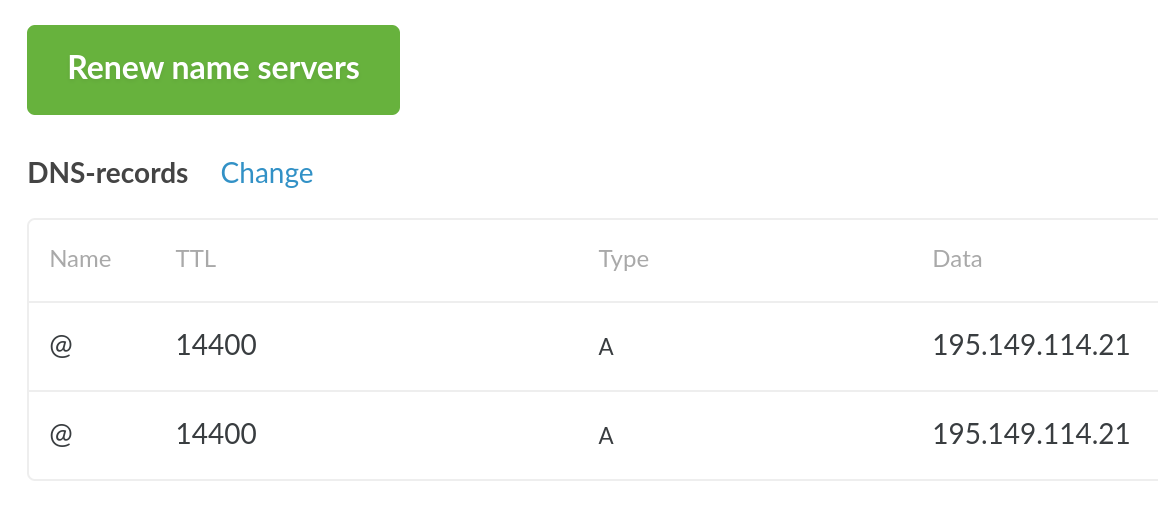
Then click the "Add Record" button and fill in the fields with the appropriate values.
- Name: @
- Type: TXT
- Text: введите значение, сгенерированное сервисом Google Sites.
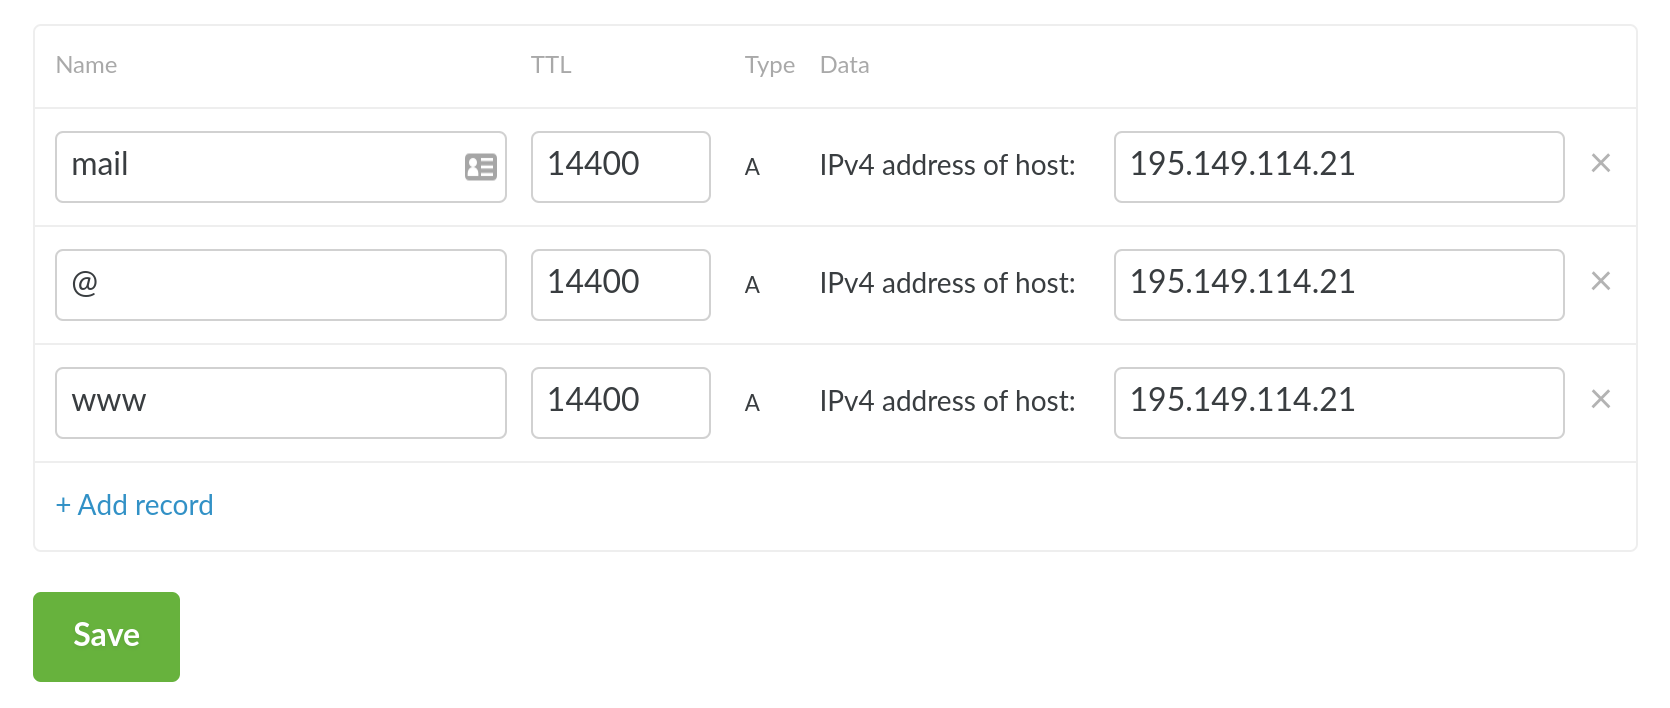
After confirming ownership, direct the domain to the site you created. To do this, first delete the A-records with the names "@" and "www".
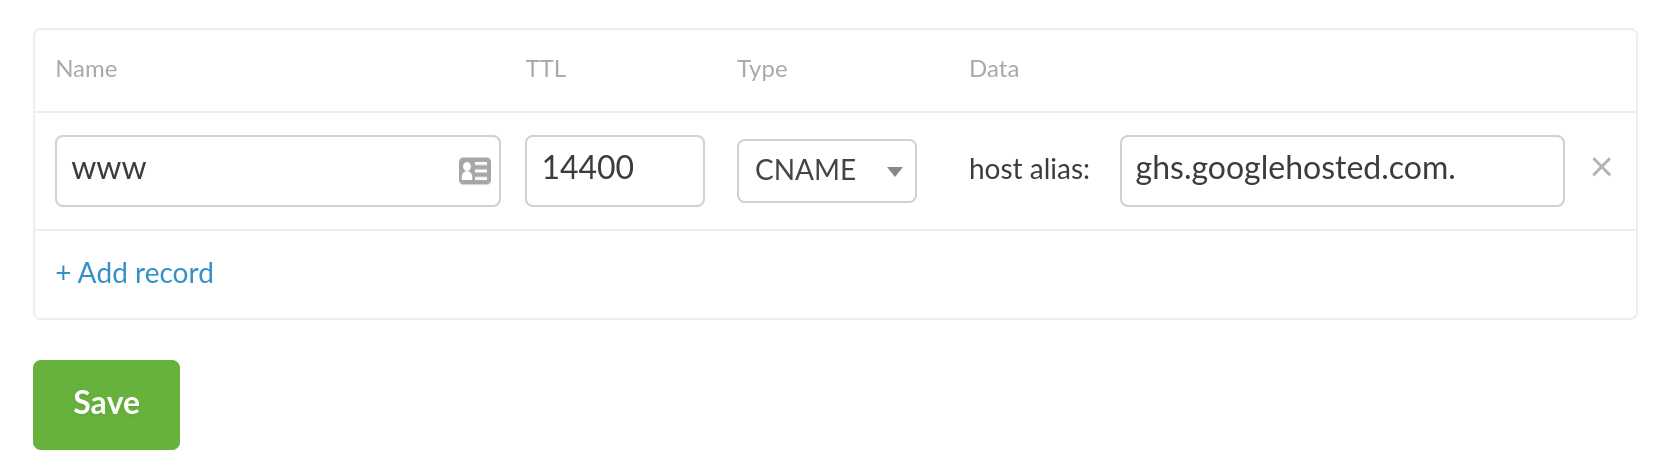
To assign your own URL to the site, create a new DNS record with the following parameters:
- Name: www
- Type: CNAME
- Data: ghs.googlehosted.com.
To make the site also available on the base domain add a new record with the "Pernament Redirect" type according to the example in the image below (specify your domain instead of 'example.com').

After creating new entries, click the "Save" button. The changes will take effect within 4-24 hours when the ISP's DNS cache is updated.
Oleksii Momot
Comments