When using a domain email, it's essential not only to send and receive emails but also to ensure that your messages don’t end up in the recipient’s spam folder. To ensure this, you must correctly configure two important DNS records: DKIM and SPF.
These records help prove that your emails are genuinely sent from your domain, reducing the chance of being flagged as spam.
What are DKIM and SPF?
DKIM is a mechanism that allows your emails to be signed with a digital signature, enabling the recipient to verify that the email was sent from the specified domain and hasn’t been altered during delivery.
SPF is a record that specifies which servers are allowed to send mail on behalf of your domain. This helps prevent your messages from being marked as spam.
Where can I find DKIM and SPF values?
Open your hosting panel, DirectAdmin, and find the "Extra Features" section. Then go to the "Email Deliverability" section.
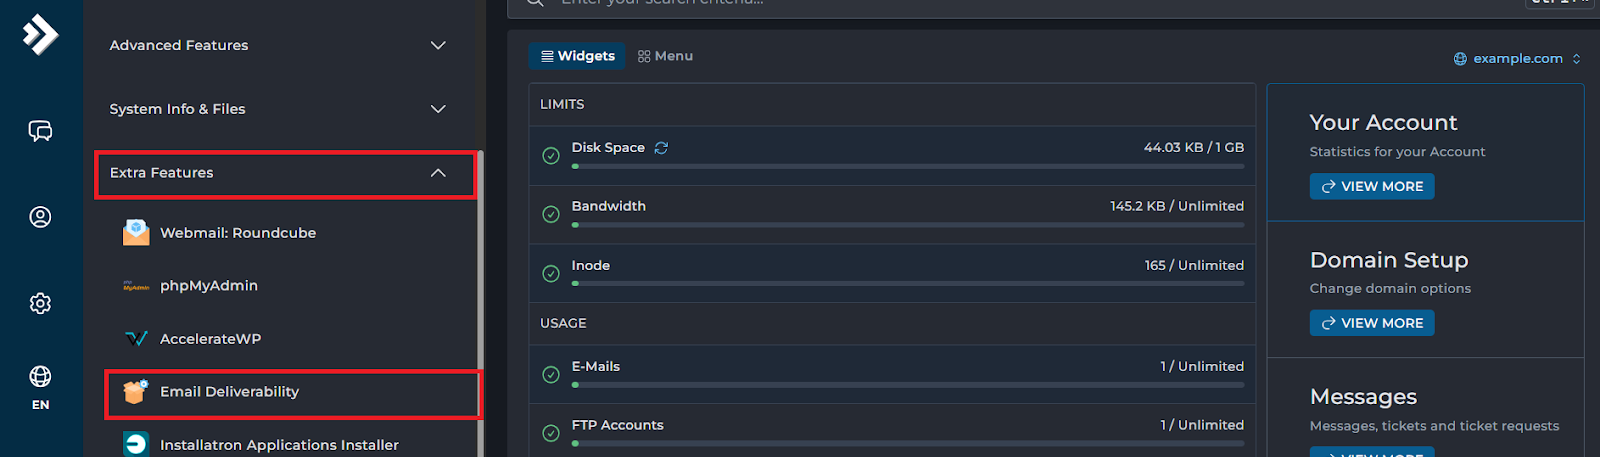
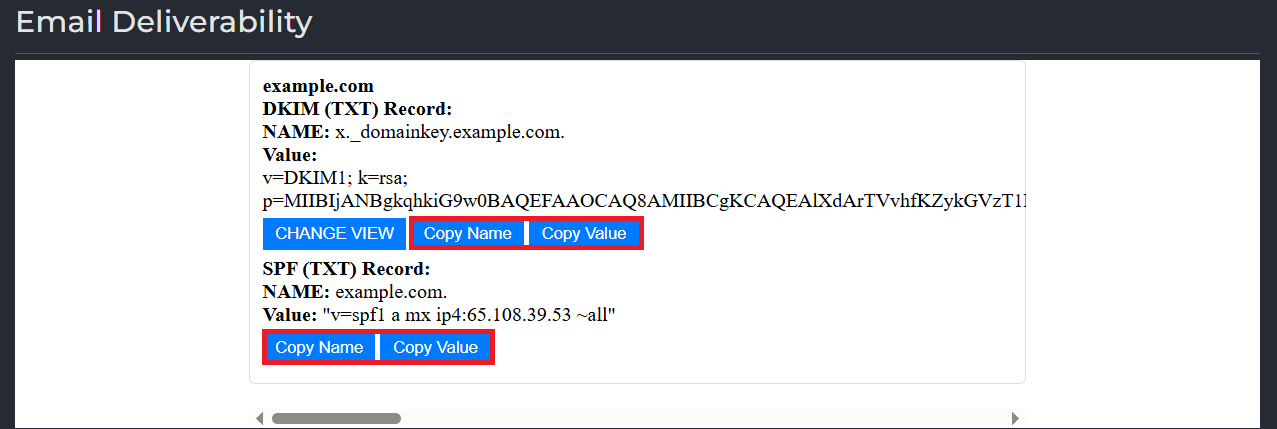
In this section, you will find the values of DKIM and SPF records for all domains added in the hosting panel.
How to add the DKIM and SPF records?
If your domain uses custom NS servers, you’ll need to configure the records at your DNS provider. If your domain uses NIC.UA name servers, login to your NIC.UA account and go to the “Name Servers (NS)” section.
You can find the domain and click the gear button next to it.
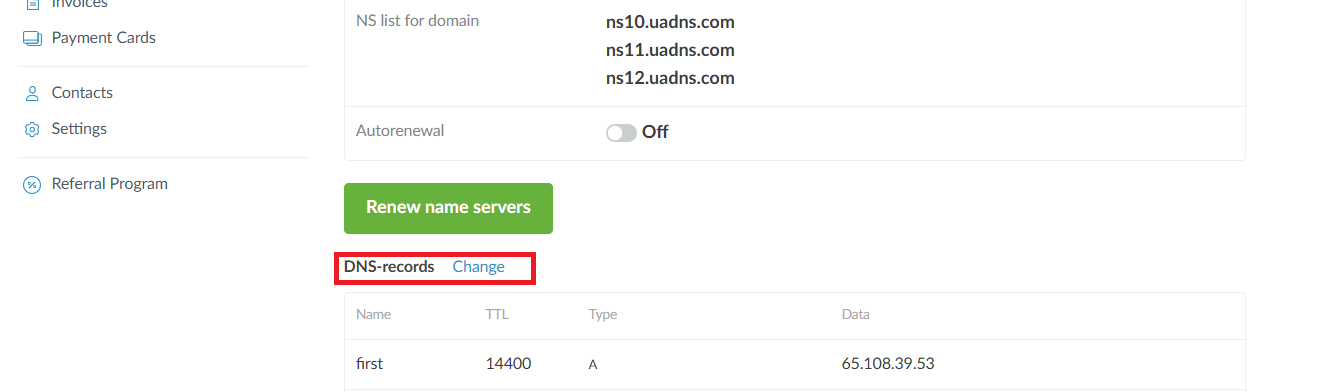
Add two new TXT records:
- In the "Name" field, paste the value you copied using the "Copy name" button in DirectAdmin.
- In the "Text" field, paste the value you copied using the "Copy value" button.
- In the TTL field, leave the value at 14400.

Kyrylo Nosenko
Comments